Saturday, May 22, 2010

Spring Art Show; part 2

More pictures from my schools first art show.........


Spring Art Show

In April I held the first art show at my show. These are some of the pictures I took that day. The students (and aides) enjoyed seeing their art displayed and honored.

I am so proud of what they have been able to accomplish through-out the past year in art.


A new Adaptive Easel!

A few weeks ago this easel arrived in my room. At my school we have a carpenter that makes adaptive equipment for all the students. His Name is Ron and he is amazing, the school is so lucky to have him.

As my students get older their wheelchairs have more difficulty fitting under the tables in the art room. I really wanted to get some type easel so my students could get right up to their work. Since traditional easels are not accessible I needed something a bit different. After meeting with Ron a couple of times he constructed this over spring break.

This easel has really made a difference in my classroom. Students of many shapes and sizes can use this easel to experience art. This works especially good for my students with a limited range of motion.


Wednesday, May 12, 2010

Color Field Painting

Color Field Painting

In this Project we looked at the work of two abstract artists: Morris Louis and Helen Frankenthaler. Both were a part of the color field painting movement of the 1960’s and 70’s. These artists used many different tools in place of brushes to paint with. They would use raw canvas and liquefied paint to create large abstract works.

In our small painting we used runny tempera paint on muslin. We used three strange tools to apply the paint: a sponge to apply the yellow, an eyedropper to apply the red and a spray bottle to apply the blue. As we worked the colors over lapped on our fabric and create new colors such as orange, green and purple.


Monday, April 26, 2010

Cloudy with a Chance of Meatballs


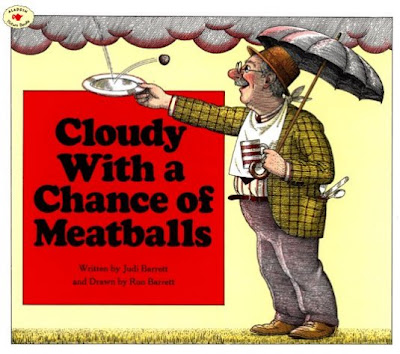
I have always loved the book Cloudy with a Chance of Meatballs and thought this would make a great interdisciplinary lesson to do at my school. I teamed up with one of the really great teachers at my school and started this month long project. She read the book in class and did other lessons that focused on the things that happened in the book and food in general.

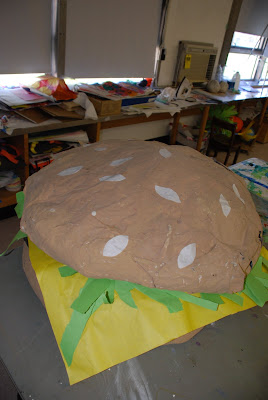
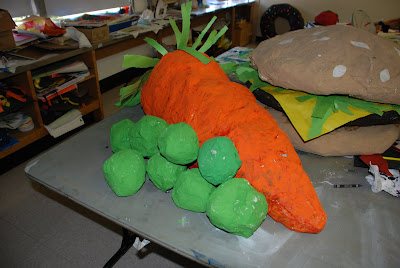
I introduced the students to the Pop artist Claus Oldenburg and his giant food sculptures. The students started to get really excited when I told them we would be making our own art based on the book and Oldenburg. For the food sculptures we would make as a class I had pre-made all the armatures out of cardboard and newspaper. We then worked together to cover the bases with strips of newspaper and paper mache paste. This took many days and was very messy, but the students loved to smooth the paper on to the forms. (I swore I would never do paper mache again, but that only lasted three weeks before I was cat it again.) After the food dried we painted each piece to look like real food. We even used colored paper to represent lettuce and cheese on our burger.

In class the students also watched the Movie version of the book and read the sequel, Pickles to Pittsburgh.

I can't wait to display this at the school wide art show this Friday.


Thursday, February 25, 2010

Creating Digital art online

I try to Incorporate the computer when I'm working with students one on one. I found this website a few weeks ago. My student are able to create a really interesting art work by using a switch to access the computer. It adds another option to my students who love the computer and hate getting messy.


Tuesday, February 23, 2010

Adaptive Scissors

Many of my student have a hard time using scissors (even ones manufactured for students with disabilities) and holding the the paper at the same time. My school's OT department came up with this wood base to mount the scissors on, so that the students just press the top of the loop while they (or the aide) move the paper along.